How to make a layered boutique hairbow
What you will need: boutique bow ( I have a tutorial for that posted), scissors, thread, needle, variety of coordinating ribbon, and a lighter
First thread your needle and set it aside.
Get the ribbon you will be using as spikes or layers. You can use one color or several colors. You can do 2 spikes or as many as you would like.
The easiest way to measure the length you want each spike is to unroll some of the ribbon and put the boutique bow you have already made on top of it. With the bow sitting on top try to get about an inch of ribbon on either side of the bow then cut the ribbon.
Using the first spike as a length guide, cut as few or as many spikes as you want. I chose to make 3 spikes each of 4 different ribbons ranging in sizes and colors.
Now that you have your spikes cut, start layering them in a criss-cross pattern one color at a time.
Remember you can do as little as 2 spikes in a single color ribbon if you want. If you are doing more colors then add your next layer of ribbon.
If you have another ribbon you are using then add another layer.
I am adding one more layer of ribbon to my spikes.
Now that you have your spikes cut and layered it is time to stitch them together. With your threaded needle stitch through the center of the ribbon being sure to go through all of the ribbon.
Pull the thread and begin wrapping it around the center of the spikes. You will want to pull it snug and gather the center of the spikes. I wrap the thread about 5 to 6 times.
Now you need to take your boutique bow and place it in the center of the spikes. Wrap the thread around the boutique bow and spikes another 5 to 6 times.
Make sure you tie the thread off on the back side of your bow and spikes.
Now it is time to trim or design the ends of your spikes. I like to use a "V" cut or single angle cut on mine but feel free to do what you like. You don't have to cut them at all if you like how it looks straight. To get a "V" in the end of your spike, fold your spike end in half lengthwise.
Cut at an upward angle starting at the fold side and going up.
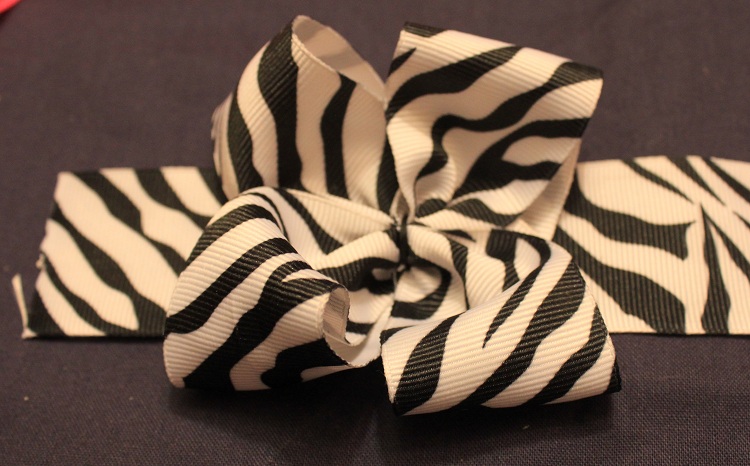
Once you are done with the edges, you need to heat seal them by running a lighter over the edges. Be careful not to hold the end of the spikes in the heat too long because they will melt. You should be left with an end product like this.
If you want to add a center to your bow, cut a piece of ribbon that will be long enough to go around the bow and tie in the back. I tie a knot in the center of the ribbon I use just because I like how it looks.
If you chose to do this your end product should look like this.
Other ways to add layers to your bows would be to add another boutique bow or more spikes. You can also add feathers to your bows or maybe some gemstones. Just have fun with it and do things you like.
I hope you enjoyed this tutorial and it helped you out. I would love to see the bows you create by following this. If you have any questions, comments, or feedback please take the time to post them!


No comments:
Post a Comment