What you will need: 1/2 yard of fabric for stocking and 1/4 yard fabric for the cuff of the stocking, scissors, sewing machine (this can be sewn by hand),needle and thread, iron, newspaper or freezer paper (to make template)
First you are going to need to draw your stocking template on a newspaper or some kind of paper big enough to fit the template. I made mine on freezer paper. You do NOT have to follow my exact sizes. You can make your stocking template like a high heel shoe, cowboy boot, traditional stocking, or elf stocking! You can also make it a lot bigger or smaller. The details are all up to you! You should have a stocking template and a cuff template.
Now that you have have your template made and cut out, pin the stocking template to the fabric you are using for the stocking. You want to make sure you have the fabric folded with good sides out so you only have to cut once. Do the same for the cuff template.
Now cut out your fabric. I always cut right outside of the template to leave a little extra room for seams.
Once you have your fabric cut out, you need to put your stocking pieces together with the good sides together. Do the same for the cuff fabric.
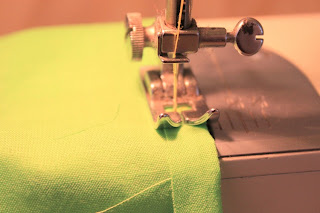
Sew along all of the sides of your stocking fabric except for the top.
Sew the sides of the cuff fabric.
After you sew the sides of the cuff fabric together, you need to fold one edge over (like the hem of a pair of pants). You can press this new seam with an iron to make sure it stays put while you sew it.
Sew this new seam in place going all the way around until you reach where you started.
You need to turn your stocking with the good side out.
Now you are going to turn the cuff with the good side out and slip it inside the stocking opening with the raw edges together.
You need to sew the stocking and the cuff together about 1/4" from the raw edges. Sew all the way around until you reach where you started from.
Now unfold the cuff over the outside of your stocking and press it in place.
You still need a hanger for your stocking. I used a matching 3/8" grosgrain ribbon. To measure the length of the hanger I wanted, I just crossed the ends and held it to my stocking to see what I like the most for length.
You are going to want to have the ends crossed or laying on top of each other and stitch them together.
Do not tie your thread off yet. When you place your hanger in the stocking you want it to be below the cuff so you can sew it through the stocking fabric and the stitch will not be seen when you are done.
You will stitch back and forth several times to make sure your hanger is secure. When you tug on it and it doesn't move you are done. Tie off your thread and fold your cuff back down. You should now have your very own handmade stocking!
As long as you don't plan on putting coal in this stocking it should last for a very long time! I hope this helps and would love to hear some feedback!!!


No comments:
Post a Comment