I am using floral ribbon because it has wire in it and helps to shape the bow. The only kind of ribbon I had around was some left over from the 4th of July ;)
You will want to use ribbon with wire because the bow will hold the shape you mold it into. You will also need some floral wire to tie the center (I used a tie I had leftover from another project, not floral wire.) You will want to use floral wire so where it is tied won't be noticed.
You want to make a loop with the ribbon leaving enough ribbon for the first tail however long you want it to be.
Now you will take the ribbon and make a loop on the other side.
You will continue making these loops, alternating sides until you are pleased with how full your bow is getting. I made 8 total loops, 4 on each side.
Your bow should be looking something like this. Once you get done with the loops you should use your floral wire to go around the center of your bow.
Now shape your bow. Separate your ribbon loops and poof them up.
I just threw this together in a few minutes but remember to take your time and make sure the loops are even and just how you want them! Good luck and let me know how it goes!
I know that the daisy flower clips with the crystal centers are very popular right now but can be somewhat expensive to buy.
Back in the summer I ran across a site, www.tdazzled.com, that has the flowers for $0.48 each. All you have to do when you get the flowers is add a little hot glue between the layers and glue on your alligator clip or whatever hair clip you use. They have a variety of colors, good quality, and you save a ton of money!
You can also get the crochet headbands that are so popular for babies right now for around $0.27.
Shipping from the site is very affordable too. It is a great way to make some profit if you are wanting to start a boutique or if you want to save money making your little cutie pie's flower clips!!!
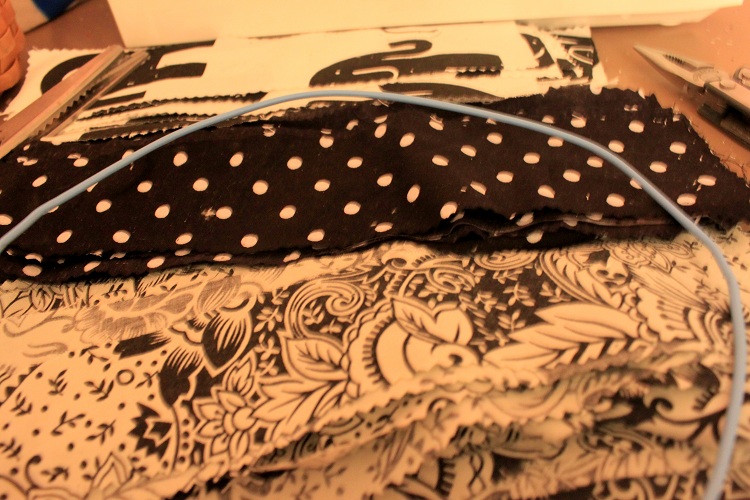
This wreath is super easy and fun to do! You will need about 45-55 strips of fabric (I cut mine 3" wide and 6" long). I cut my strips with pinking shears but you can use regular scissors.
You can use a wire wreath form but I used a wire clothes hanger because they are a LOT cheaper and on hand. If you use the wreath form you will need a good bit more strips. If you are using the hanger, you will need to shape it into a circle. You can either clip the hook part off of the hanger with wire cutters or you can undo the hook part and wrap it around the wire so it's all smooth and one circle.
Now tie your strips onto your hanger or wreath form. When you fill up your hanger or wreath from just add a ribbon tie to hang it with.
What you will need: 1/2 yard of fabric for stocking and 1/4 yard fabric for the cuff of the stocking, scissors, sewing machine (this can be sewn by hand),needle and thread, iron, newspaper or freezer paper (to make template)
First you are going to need to draw your stocking template on a newspaper or some kind of paper big enough to fit the template. I made mine on freezer paper. You do NOT have to follow my exact sizes. You can make your stocking template like a high heel shoe, cowboy boot, traditional stocking, or elf stocking! You can also make it a lot bigger or smaller. The details are all up to you! You should have a stocking template and a cuff template.
Now that you have have your template made and cut out, pin the stocking template to the fabric you are using for the stocking. You want to make sure you have the fabric folded with good sides out so you only have to cut once. Do the same for the cuff template.
Now cut out your fabric. I always cut right outside of the template to leave a little extra room for seams.
Once you have your fabric cut out, you need to put your stocking pieces together with the good sides together. Do the same for the cuff fabric.
Sew along all of the sides of your stocking fabric except for the top.
Sew the sides of the cuff fabric.
After you sew the sides of the cuff fabric together, you need to fold one edge over (like the hem of a pair of pants). You can press this new seam with an iron to make sure it stays put while you sew it.
Sew this new seam in place going all the way around until you reach where you started.
You need to turn your stocking with the good side out.
Now you are going to turn the cuff with the good side out and slip it inside the stocking opening with the raw edges together.
You need to sew the stocking and the cuff together about 1/4" from the raw edges. Sew all the way around until you reach where you started from.
Now unfold the cuff over the outside of your stocking and press it in place.
You still need a hanger for your stocking. I used a matching 3/8" grosgrain ribbon. To measure the length of the hanger I wanted, I just crossed the ends and held it to my stocking to see what I like the most for length.
You are going to want to have the ends crossed or laying on top of each other and stitch them together.
Do not tie your thread off yet. When you place your hanger in the stocking you want it to be below the cuff so you can sew it through the stocking fabric and the stitch will not be seen when you are done.
You will stitch back and forth several times to make sure your hanger is secure. When you tug on it and it doesn't move you are done. Tie off your thread and fold your cuff back down. You should now have your very own handmade stocking!
As long as you don't plan on putting coal in this stocking it should last for a very long time! I hope this helps and would love to hear some feedback!!!
What you will need: boutique bow ( I have a tutorial for that posted), scissors, thread, needle, variety of coordinating ribbon, and a lighter
First thread your needle and set it aside.
Get the ribbon you will be using as spikes or layers. You can use one color or several colors. You can do 2 spikes or as many as you would like.
The easiest way to measure the length you want each spike is to unroll some of the ribbon and put the boutique bow you have already made on top of it. With the bow sitting on top try to get about an inch of ribbon on either side of the bow then cut the ribbon.
Using the first spike as a length guide, cut as few or as many spikes as you want. I chose to make 3 spikes each of 4 different ribbons ranging in sizes and colors.
Now that you have your spikes cut, start layering them in a criss-cross pattern one color at a time.
Remember you can do as little as 2 spikes in a single color ribbon if you want. If you are doing more colors then add your next layer of ribbon.
If you have another ribbon you are using then add another layer.
I am adding one more layer of ribbon to my spikes.
Now that you have your spikes cut and layered it is time to stitch them together. With your threaded needle stitch through the center of the ribbon being sure to go through all of the ribbon.
Pull the thread and begin wrapping it around the center of the spikes. You will want to pull it snug and gather the center of the spikes. I wrap the thread about 5 to 6 times.
Now you need to take your boutique bow and place it in the center of the spikes. Wrap the thread around the boutique bow and spikes another 5 to 6 times.
Make sure you tie the thread off on the back side of your bow and spikes.
Now it is time to trim or design the ends of your spikes. I like to use a "V" cut or single angle cut on mine but feel free to do what you like. You don't have to cut them at all if you like how it looks straight. To get a "V" in the end of your spike, fold your spike end in half lengthwise.
Cut at an upward angle starting at the fold side and going up.
Once you are done with the edges, you need to heat seal them by running a lighter over the edges. Be careful not to hold the end of the spikes in the heat too long because they will melt. You should be left with an end product like this.
If you want to add a center to your bow, cut a piece of ribbon that will be long enough to go around the bow and tie in the back. I tie a knot in the center of the ribbon I use just because I like how it looks.
If you chose to do this your end product should look like this.
Other ways to add layers to your bows would be to add another boutique bow or more spikes. You can also add feathers to your bows or maybe some gemstones. Just have fun with it and do things you like.
I hope you enjoyed this tutorial and it helped you out. I would love to see the bows you create by following this. If you have any questions, comments, or feedback please take the time to post them!
What you will need: ribbon, thread, needle, scissors, alligator clip, hot glue gun
You will need about 20" of ribbon. I prefer to use 1" to 2" grosgrain ribbon.
Go ahead and thread your needle and put it aside.
Fold your ribbon in half lengthwise.
Press the seam where your ribbon is folded with your finger. It should leave a seam to mark the center.
Now you need to unfold your ribbon. Take the right end of your ribbon and fold to the center like you are making a figure 8.
Now do the same with the left end of the ribbon.
The next thing you need to do is fold the center of the loop you created in the figure 8 to the center of the ribbon.
Now do the same with the other end of the figure 8.
You will want to make sure your ribbon is even on both sides so the bow comes out even.
Take your threaded needle and stitch through the center of the bow.
Pull the thread tight and wrap around the center of the bow a few times ( I usually wrap around 5 to 6 times).
On the back side of your bow, tie off your thread.
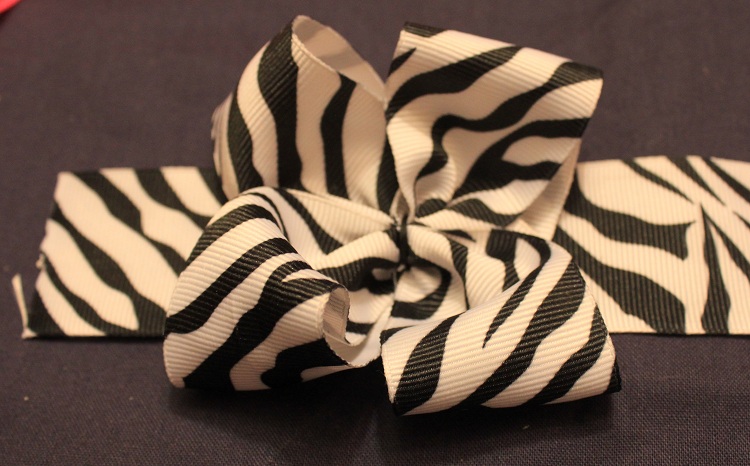
Now you should have a bow that looks something like this. Don't worry if it is not perfect the first time. It takes some practice.
So now you have a bow but you still need to attach it to a hair clip. I use partially lined alligator clips and will show you how to use those now.
You will need a alligator clip, 3/8" ribbon, and a hot glue gun.
Put one end of the ribbon inside of the clip. Then put hot glue on the top side of the clip.
Fold the ribbon over the top and snip off the ribbon at the end of the clip.
All you have to do now is put hot glue on the clip and attach it to your bow.
I hope this has helped. I would love to hear some feedback or see how your first bow turned out!